Private Self made Cloud Connectivity - Add new connectivity
In this guide, we will walk you through the steps to provision or designed an Azure cloud connector. Let's get started!
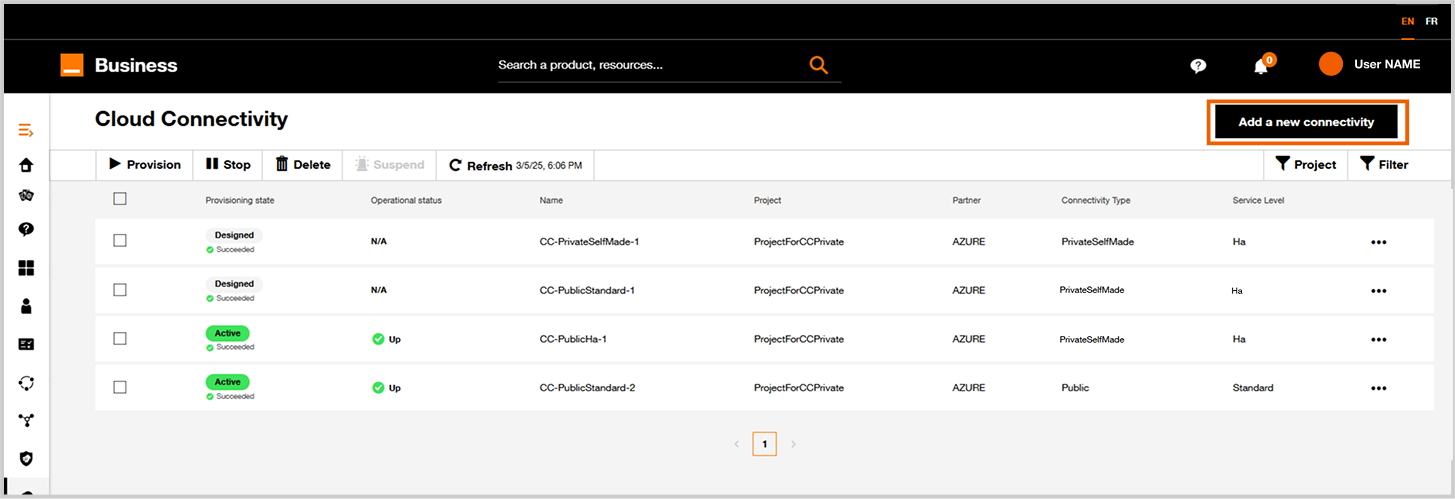
1. Add new connectivity
From the inventory, in the upper right, click on the "Add new connectivity" button.
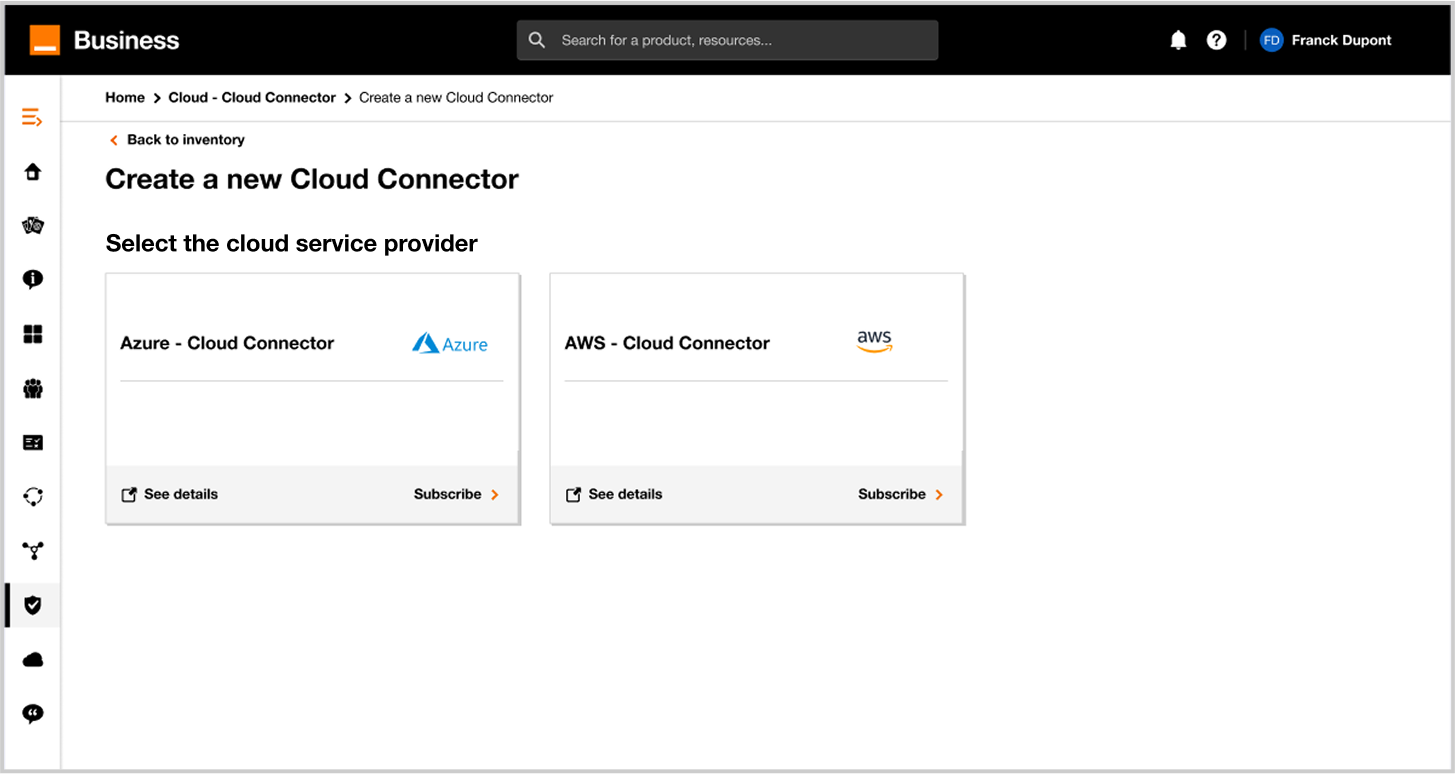
2. Choose you service provider
For this exemple, click on "Subscribe" link in Azure tile.
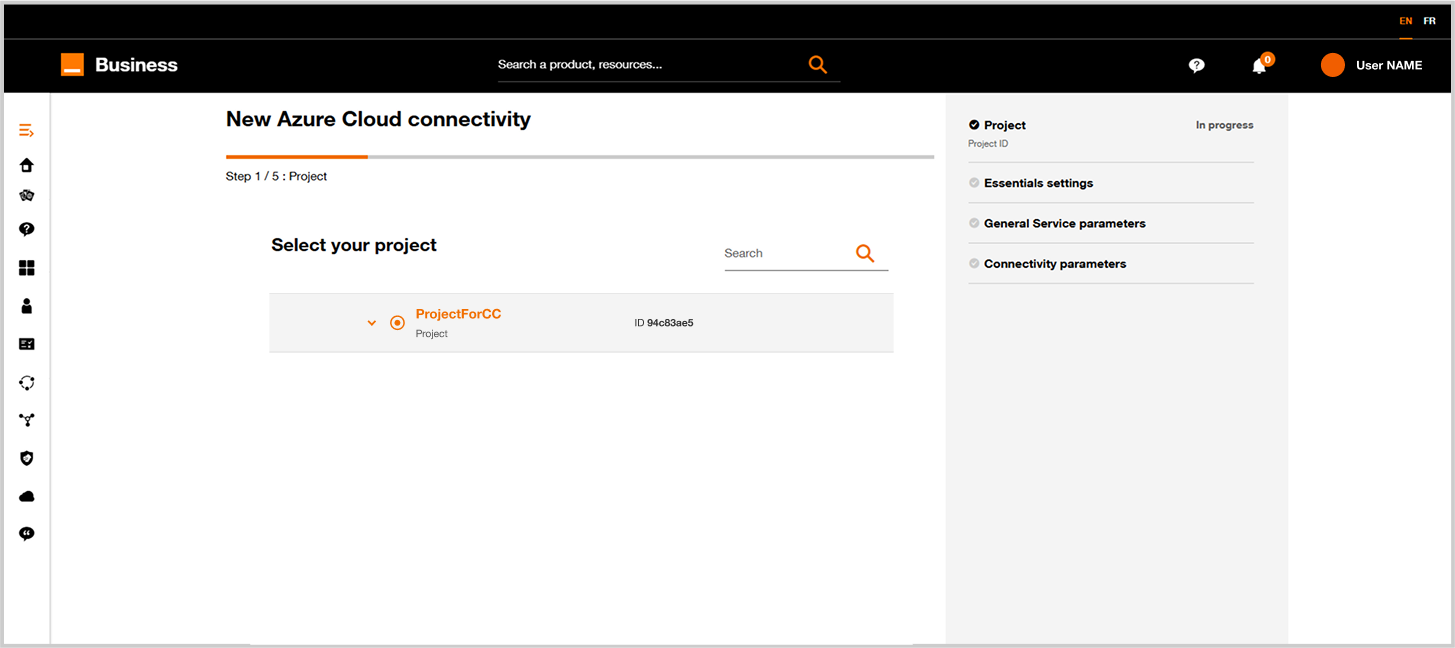
3. Select your project
Select an existing project for a cloud connectors hosting the Cloud connector.
4. Fill in the First Settings Form

Define a name for your new Cloud Connector.
Choose Private Self-made tile.
Click on Next button
5. Cloud configuration
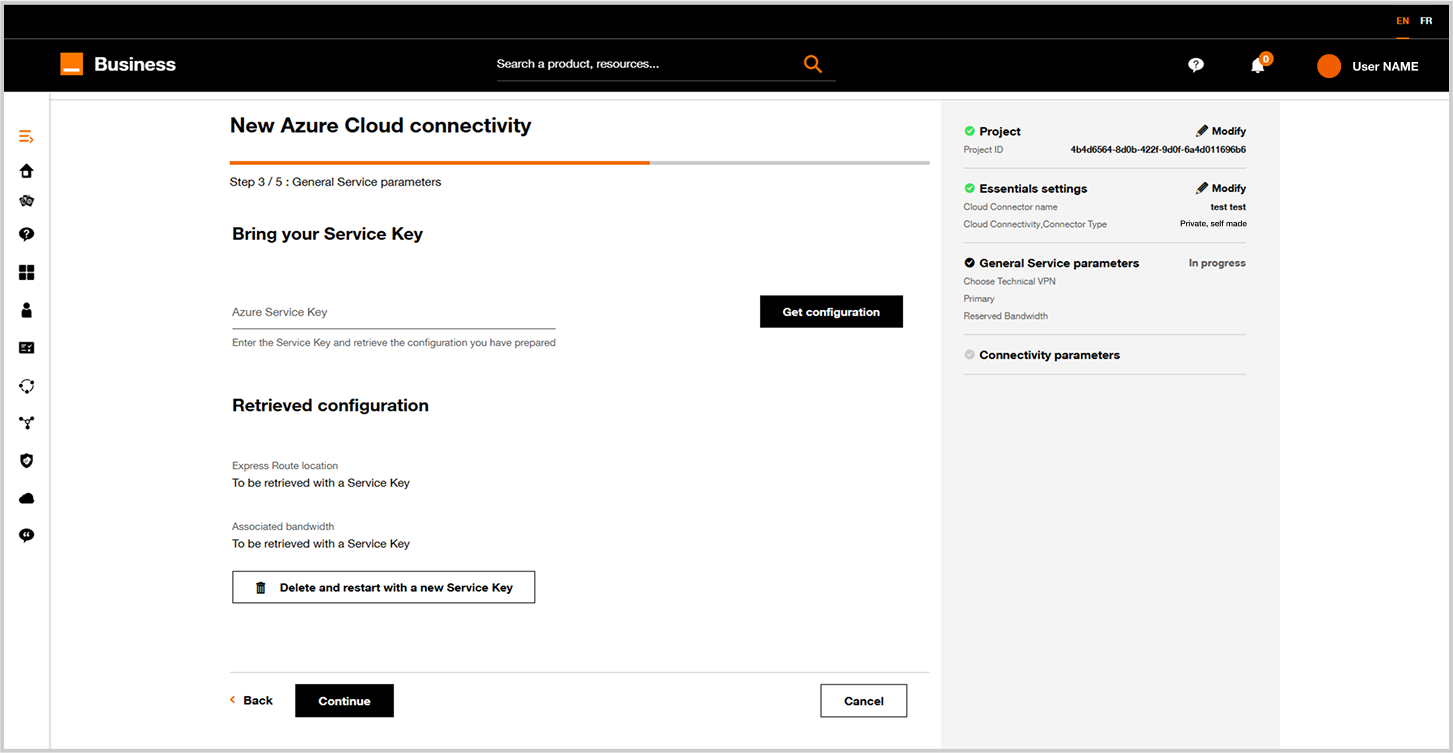
Update connector form step 3.
Apply the following process:
- Fill the Azure service key field with a service key
- Finalize the configuration by clicking
Get configuration
Click on Next button.
6. Connectivity parameters
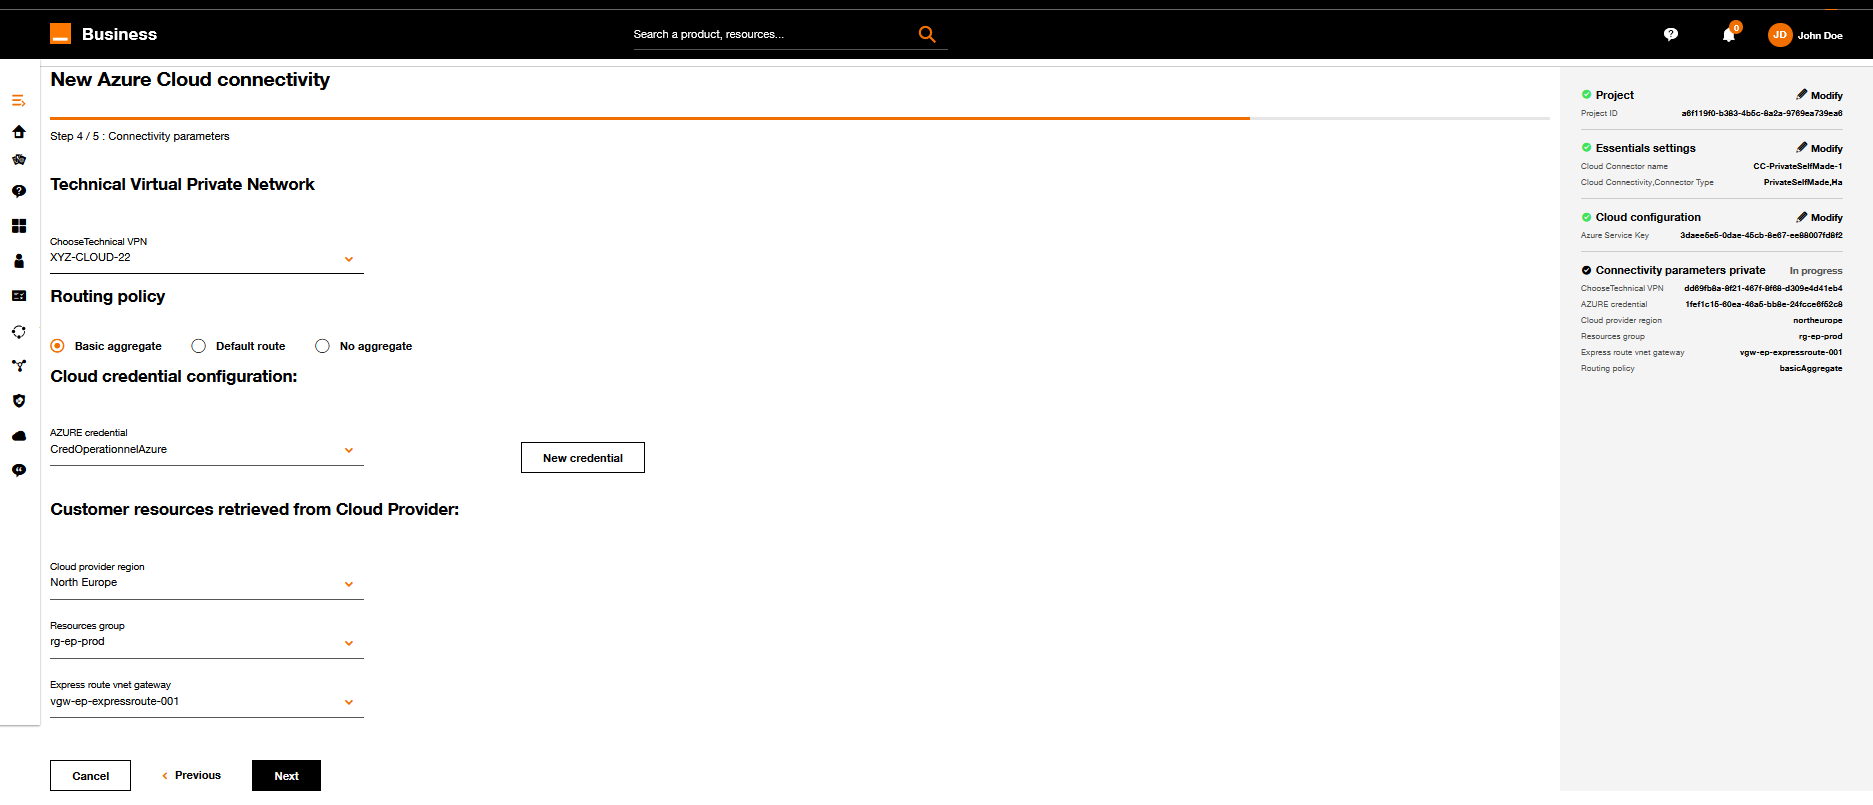
Update connector form step 4.
| Parameter | Description |
|---|---|
| Technical VPN | Select the technical VPN you want to interconnect with Azure. |
| Routing policy |
|
| Customer resource retrieved from cloud connector |
|
Apply the requested changes and click on Next when it's ok.
Cloud provider region, Resources group are used to help the user to define the "Express route vnet gateway" he wants to link to the express route circuit associated to the service key (SKEY).
The "Express route vnet gateway" is optional.
If an "Express route vnet gateway" is defined the application will try to provision an connection between the express route circuit and the Express route vnet gateway.
If no "Express route vnet gateway" is defined the application won't provision any connection. This is usefull when your gateway are not in same resources group than express route circuit or when you have a Gateway not supported such as an Azure Virtual Wan Gateway.
7. Summary and pricing
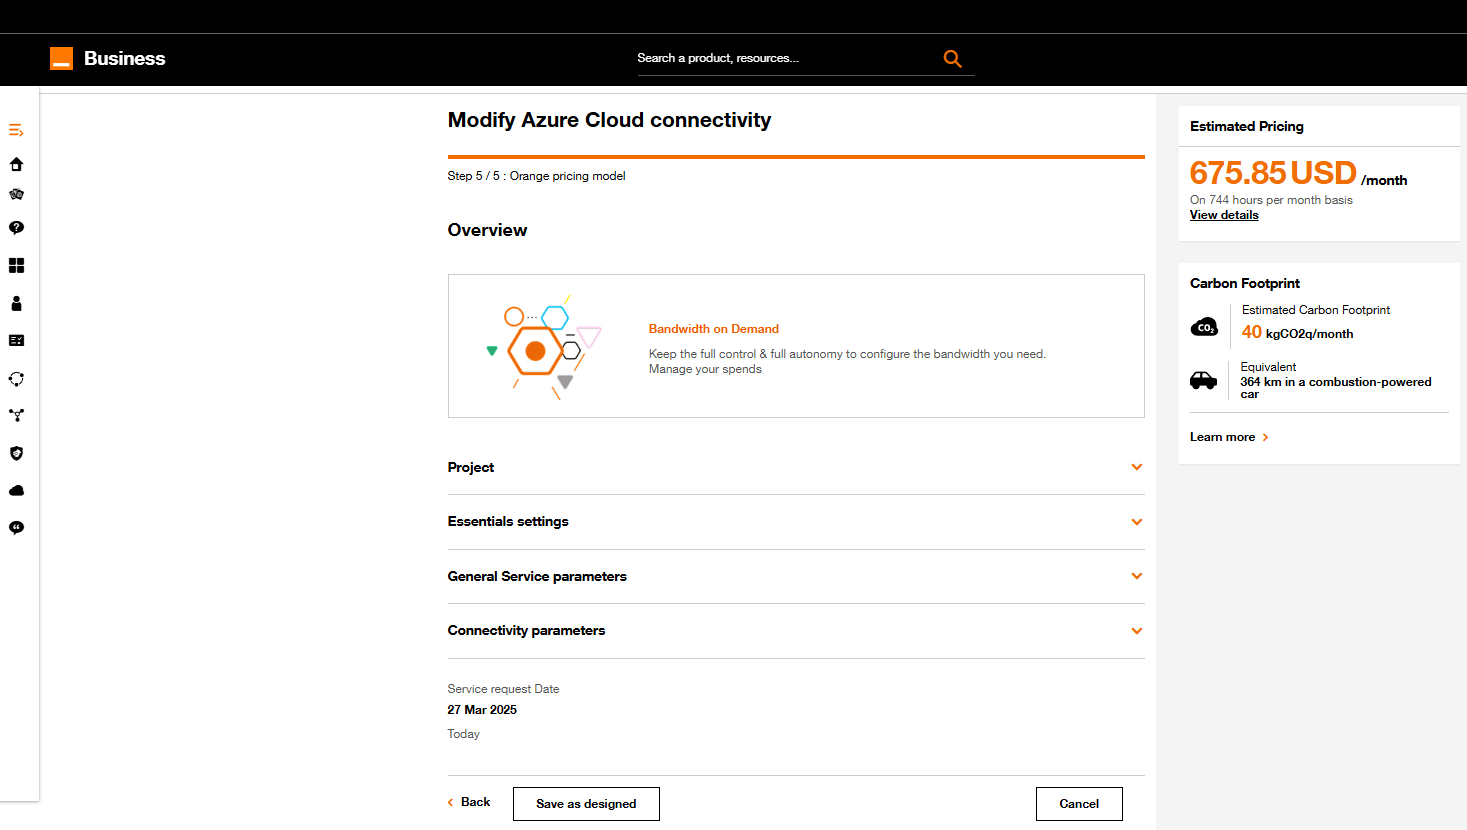
Update connector form step 5.
- On this screen you have on the right a summary of the cloud connector configuration.
- Soon you will have an estimated pricing for this configured cloud connector.
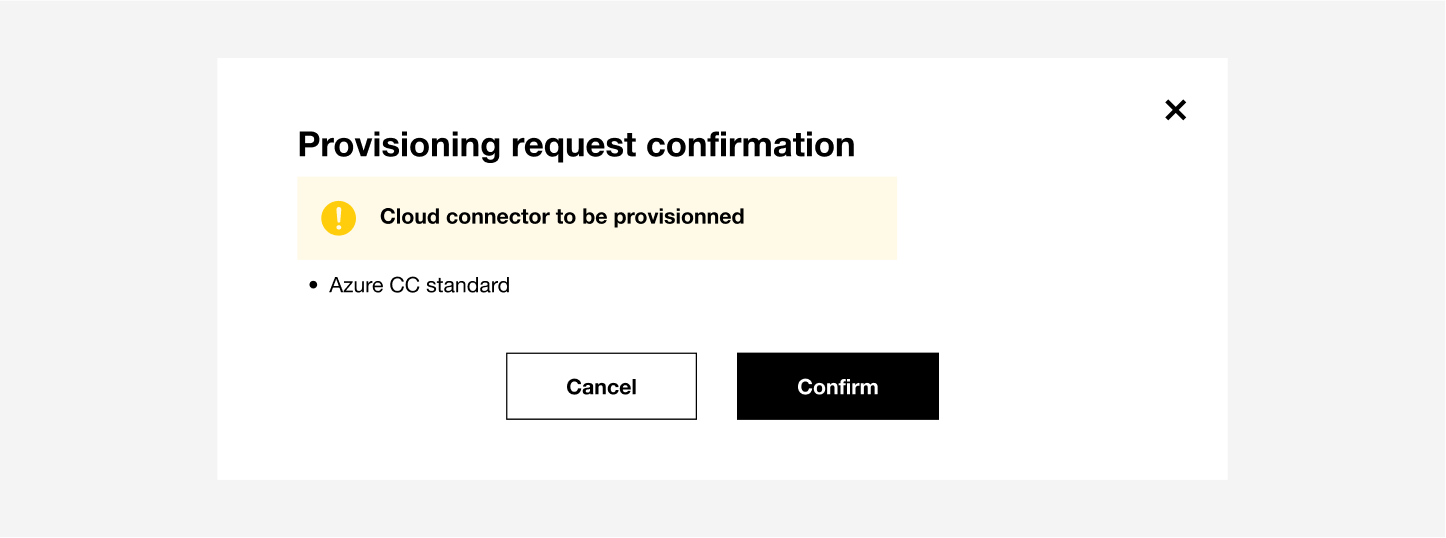
9. Provision or Save as “Designed”
Click on Save as designed if you want to save your new configuration.
When clicking on Provision, a screen will appear, indicating the cloud connector is being provisioned.
You will be able to provision last the cloud connector from Cloud Connector Inventory. See Provision.
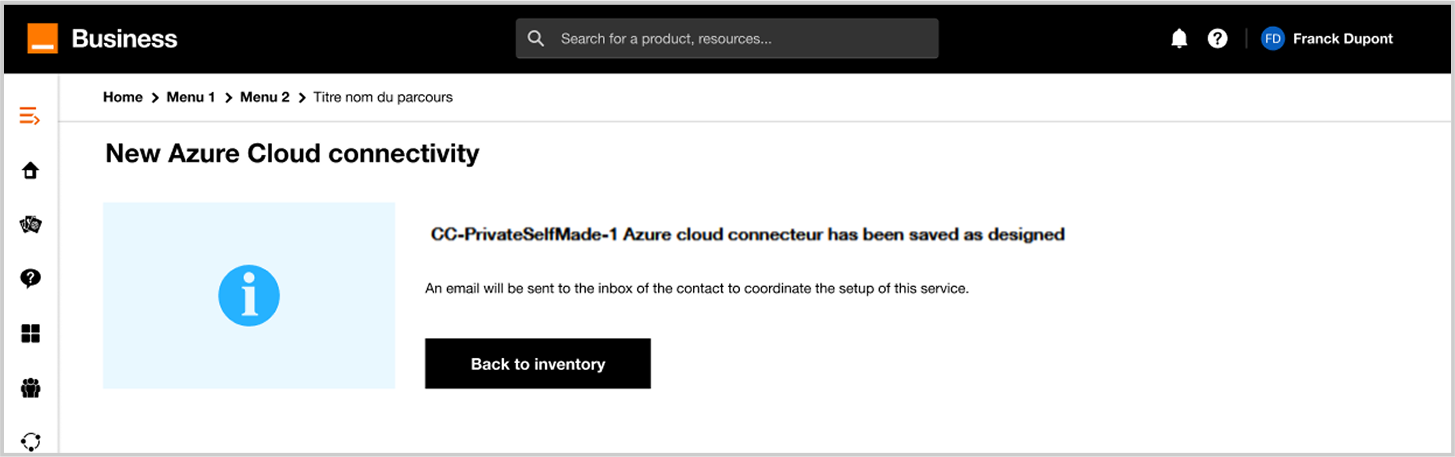
If you click on Back to the dashboard, you can see your new cloud connector in the inventory.
Refer to Workflow Execution section.
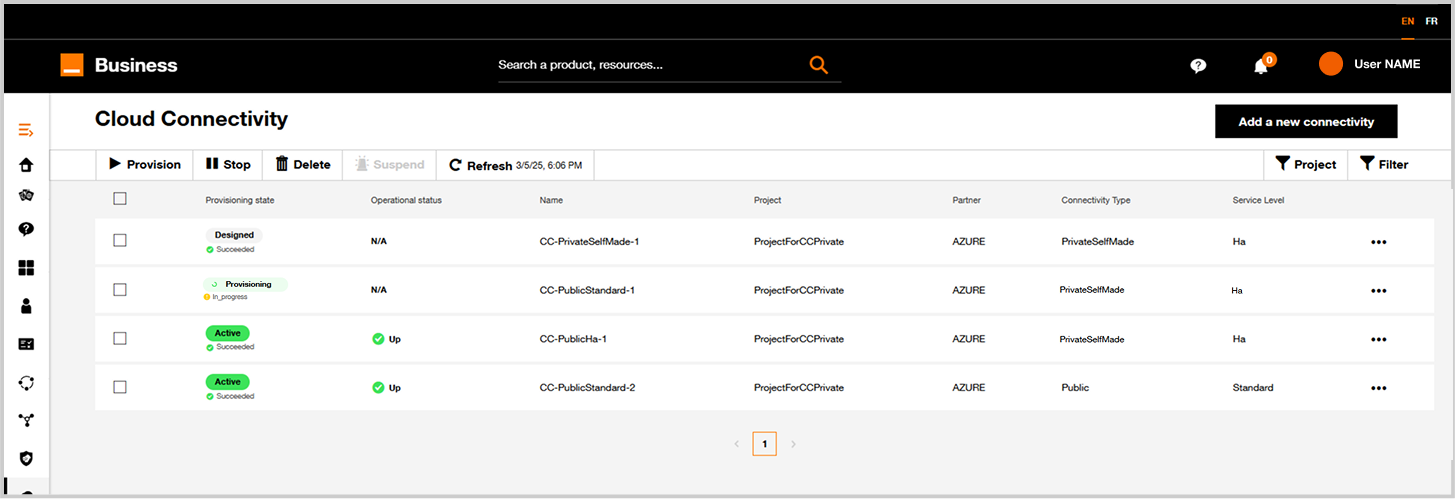
Cloud Connector inventory after a Cloud Connector update.